Dispositions and Initial Manoeuvres
When Arran mustered his men at the Peel on the 3rd September, he had a difficult decision to make. What best to do with his troops? He could fall back on Edinburgh, hoping Angus would meet up with him and form a defensive line, say along the River Crammond. Alternatively he could fortify the town and block Lennox's advance along the High Street. The first of these options looked good on paper but risked letting Lennox into the town without a fight and just maybe his troops would take to plundering.The second threatened a battle within the Burgh boundaries where the towns people would be subjected to the risks and horrors of battle.
 Alternatively Arran could blockade the only safe route into town for heavy guns and baggage. The Avon in September was by no means impassable for the Lennox infantry and cavalry but their heavy equipment would have to go across the bridge. This position also meant the town would not come under direct assault ; unless of course the Douglases failed to arrive in time and the Hamiltons were forced off their hill! Would Lennox be able to hold his blooded troops in check as they made their way through the 'enemy's' town ?
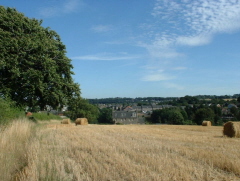
However his second problem was lack of numbers. How best to deploy his meagre force to cover and hold all the main routes into town. According to Buchanan, Arran placed a small guard of some 200 men at the bridge and the rest of his men 'on the brow of the hills which they knew the enemy must pass'. There are however a number of hills between the brig and the West Port of the town. However, only Pace Hill overlooked not only the bridge, but also the route in from Torphichen. It would seem to be the ideal location.
Angus had his own problems on the 3rd. The King was tardy to say the least in authorising the raising of the Edinburgh and Leith militia. Despite his protestations, Angus only had some 2-3000 men at hand to help his ally. Should he stay longer to raise more troops and risk being to late to help Arran? Or should he leave sooner with fewer men and risk arriving with insufficient forces to be of any good? He decided to wait until the morning of the 4th to move out towards Linlithgow.
Lennox's situation was clear enough. He had to march on Edinburgh as quickly as he could and hopefully avoid a pitched battle. He also had made his move on the 3rd September, leaving Stirling in the morning and probably halving the distance that day to Linlithgow. On the morning of the 4th, he realised that Arran was prepared to make a stand; how and where he was yet to find out. In the meantime he would rouse his men early and head out towards Edinburgh.
 As the morning wore on it became clear to Lennox that Arran was making a stand at the Brig. Outriders, scouts and sympathetic locals reported that the Brig was blocked and the Douglases were on the road out of Edinburgh. Lennox would have to think fast. Does he storm the bridge wasting time and men? Could he move south of the Riccarton Hills outflanking Hamilton but leaving a large enemy force in his rear? Or alternatively could he outflank Hamilton, cross upstream and negate the defenses set up by his adversary. Maybe Arran had no stomach for a fight and by this mere manouevre alone he could persuade Arran that the position was hopeless and he should swap sides. As Lennox approached Haining Castle it is likely his scouts had told him of the ford at Manuel. Leaving his baggage and heavier ordnance overlooking the bridge, Lennox decided to outflank the Hamilton position.
Arran would have looked on wth some trepidation as Lennox's force, perhaps three to four times the size of his own moved into view. Should he stand, fall back or swap sides?
What happened next is open to some debate. One theory being that Angus arived on site before the battle and both commanders decided to fight it out. Alternatively it was James Hamilton of Finnart, he of 'Clense the Causeway' fame, who persuaded Arran to attack before Angus had arrived. But how best to do this? Lennox's flank march may have negated the defensive nature of the river, but the Hamiltons still held the relatively high ground blocking the route into town.
Some accounts suggest Arran moved his men along the bluffs and fought out the action opposite the Manuel Nunnery. Others suggest that the Hamiltons remained on Pace Hill, turned to face south and used their height advantage when it came to the push of pikes. Perhaps only the archaeology will prove what really happened. Whatever the final location by early afternoon the die was cast and the troops were 'locked together' in combat.

